+1fracol wrote:I like the way you post a few photos everyday. It keeps a sort of suspense going.

Sep 4th, '11, 18:14
Posts: 1777
Joined: Jun 4th, '08, 19:41
Scrolling: scrolling
Location: Stockport, England
Contact:
Herb_Master
Re: The process of making a Yixing teapot

Re: The process of making a Yixing teapot
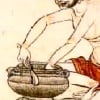
Thanks!fdrx wrote:night.owl> found on yinwenqian's website : http://bit.ly/rcOrxW
What an amazing amount of work that goes into them!
Sep 5th, '11, 08:54
Posts: 73
Joined: Sep 21st, '10, 09:19
Location: yixing,CChina
Contact:
yinwenqian
Sep 5th, '11, 08:55
Posts: 73
Joined: Sep 21st, '10, 09:19
Location: yixing,CChina
Contact:
yinwenqian
Sep 5th, '11, 11:42
Posts: 352
Joined: Jan 4th, '11, 06:20
Location: Warsaw, PL, EU
Contact:
andrzej bero
Re: The process of making a Yixing teapot
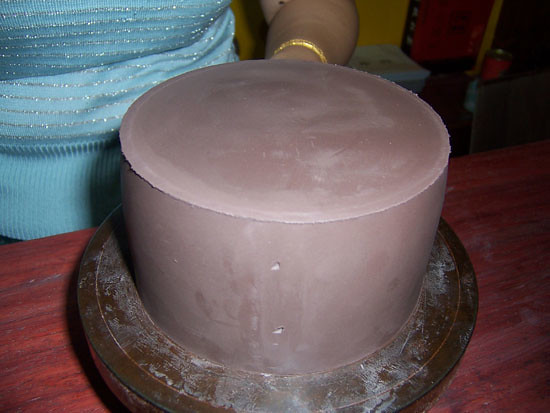
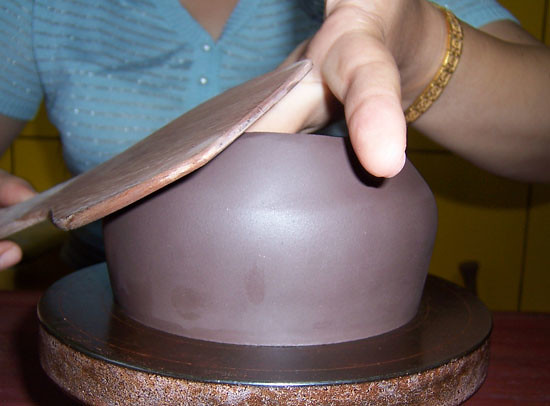
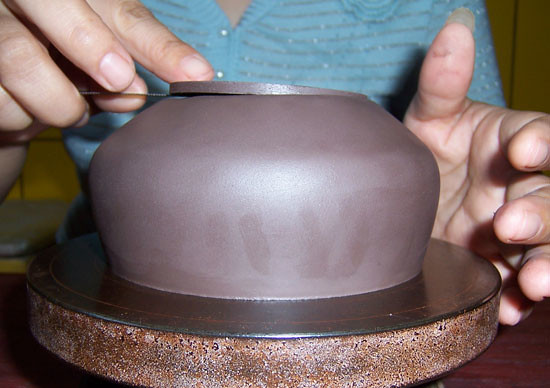
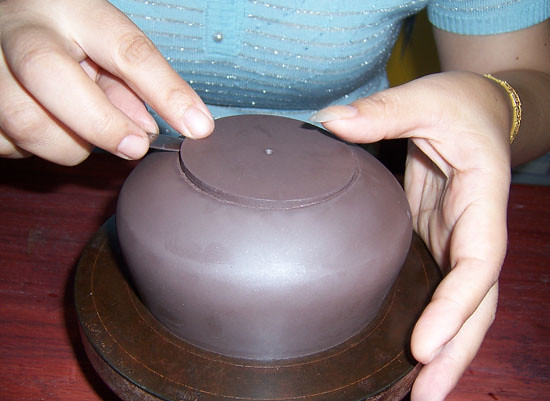
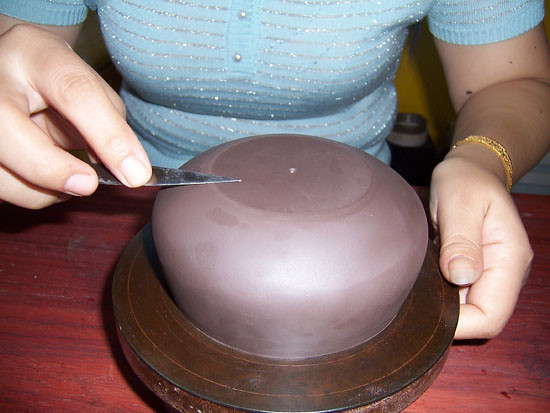
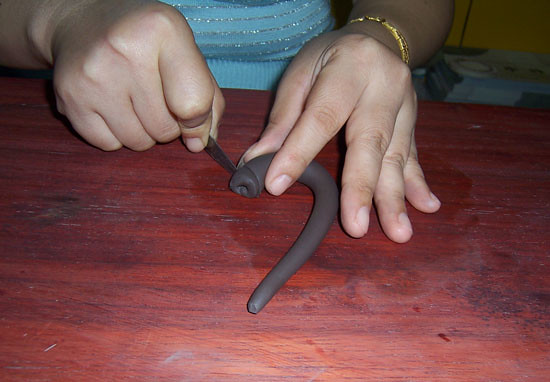
I do not understand what happend between last two posts. First you close your shape but on the last picture form is back open. (?)
Mayby next pictures will explain this puzzle:) Thanks, very interesting.
Mayby next pictures will explain this puzzle:) Thanks, very interesting.

Re: The process of making a Yixing teapot
I believe he made the bottom of the teapot in the last two posts, and then he turned the put so the top is facing up.andrzej bero wrote:I do not understand what happend between last two posts. First you close your shape but on the last picture form is back open. (?)
Mayby next pictures will explain this puzzle:) Thanks, very interesting.

Sep 5th, '11, 13:50
Posts: 20891
Joined: Apr 22nd, '06, 20:52
Scrolling: scrolling
Location: Back in the TeaCave atop Mt. Fuji
Re: The process of making a Yixing teapot
I keep checking to see if this maker will change her shirt ...fracol wrote:I like the way you post a few photos everyday. It keeps a sort of suspense going.
But yeah, this in the tiny semi daily doses gives us time to absorb bit by bit. Had you loaded everything in one shot, we would likely have breezed through all the photos versus taking our time as we are forced to do here.
Well played!
Sep 5th, '11, 16:38
Posts: 352
Joined: Jan 4th, '11, 06:20
Location: Warsaw, PL, EU
Contact:
andrzej bero
Re: The process of making a Yixing teapot
maybe, but on 1st page there is a bottom from the begining. On one of the lasts pictures she puts a patch of clay on the top. If I am not wrong it should close the form (turned or not). time will tell:). hugsTuoChaTea wrote:I believe he made the bottom of the teapot in the last two posts, and then he turned the put so the top is facing up.andrzej bero wrote:I do not understand what happend between last two posts. First you close your shape but on the last picture form is back open. (?)
Mayby next pictures will explain this puzzle:) Thanks, very interesting.
Sep 5th, '11, 19:44
Posts: 1777
Joined: Jun 4th, '08, 19:41
Scrolling: scrolling
Location: Stockport, England
Contact:
Herb_Master
Re: The process of making a Yixing teapot
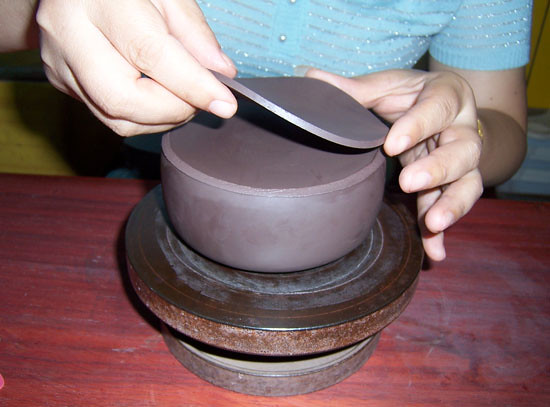
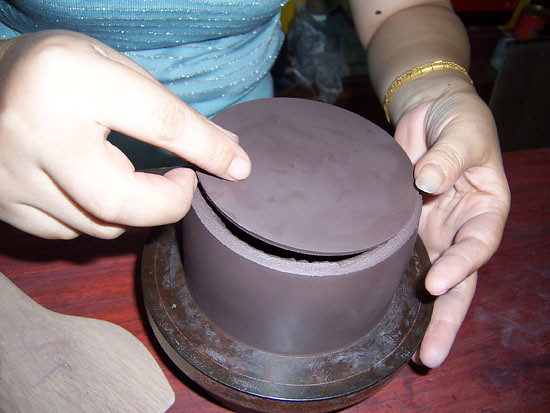
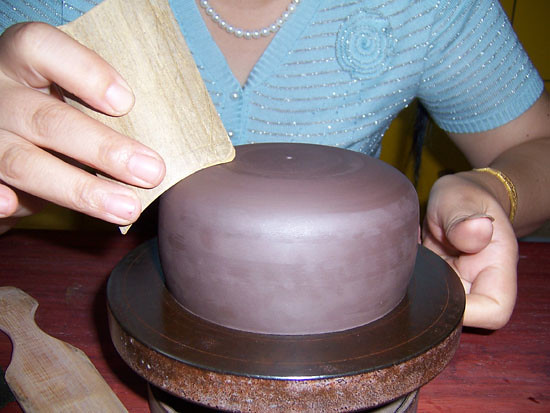
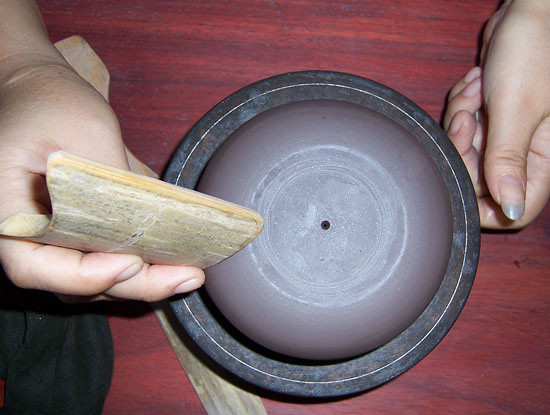
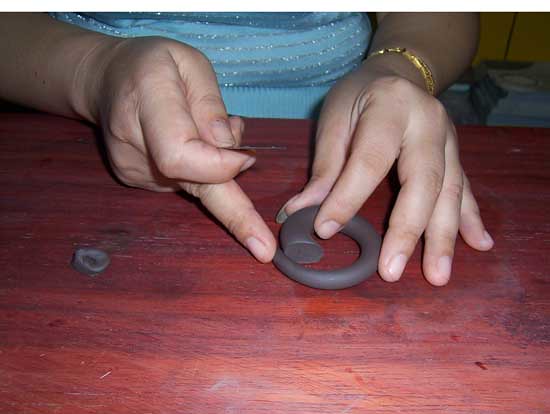
I noticed that too - I was wondering if the base in photos 5 and 6 (seen again in 7 and 8, whilst smoothing out the seam) was in fact a sort of template to hold the size of the teapot to a correct diameter.andrzej bero wrote:
maybe, but on 1st page there is a bottom from the begining. On one of the lasts pictures she puts a patch of clay on the top. If I am not wrong it should close the form (turned or not). time will tell:). hugs
And maybe to help keep it more stable while it is being worked on ?
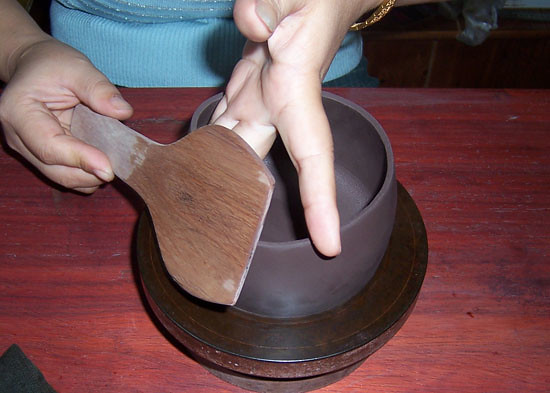
7 and 8 showing smoothing the vertical seam, but there are no photos of the base being being applied with slip, or being smoothed out.
Then, perhaps, between the 2 photos you mention, the pot is carefully lifted off from the template ??
Sep 6th, '11, 04:51
Posts: 352
Joined: Jan 4th, '11, 06:20
Location: Warsaw, PL, EU
Contact:
andrzej bero
Re: The process of making a Yixing teapot
it has sens. Interesting trick.Herb_Master wrote:I noticed that too - I was wondering if the base in photos 5 and 6 (seen again in 7 and 8, whilst smoothing out the seam) was in fact a sort of template to hold the size of the teapot to a correct diameter.andrzej bero wrote:
maybe, but on 1st page there is a bottom from the begining. On one of the lasts pictures she puts a patch of clay on the top. If I am not wrong it should close the form (turned or not). time will tell:). hugs
And maybe to help keep it more stable while it is being worked on ?
7 and 8 showing smoothing the vertical seam, but there are no photos of the base being being applied with slip, or being smoothed out.
Then, perhaps, between the 2 photos you mention, the pot is carefully lifted off from the template ??
Sep 8th, '11, 05:17
Posts: 73
Joined: Sep 21st, '10, 09:19
Location: yixing,CChina
Contact:
yinwenqian
Re: The process of making a Yixing teapot
you are right,very cleverTuoChaTea wrote:I believe he made the bottom of the teapot in the last two posts, and then he turned the put so the top is facing up.andrzej bero wrote:I do not understand what happend between last two posts. First you close your shape but on the last picture form is back open. (?)
Mayby next pictures will explain this puzzle:) Thanks, very interesting.
Sep 8th, '11, 05:24
Posts: 73
Joined: Sep 21st, '10, 09:19
Location: yixing,CChina
Contact:
yinwenqian
Sep 8th, '11, 05:27
Posts: 73
Joined: Sep 21st, '10, 09:19
Location: yixing,CChina
Contact:
yinwenqian
Sep 8th, '11, 05:30
Posts: 73
Joined: Sep 21st, '10, 09:19
Location: yixing,CChina
Contact:
yinwenqian
Sep 8th, '11, 05:31
Posts: 73
Joined: Sep 21st, '10, 09:19
Location: yixing,CChina
Contact:
yinwenqian